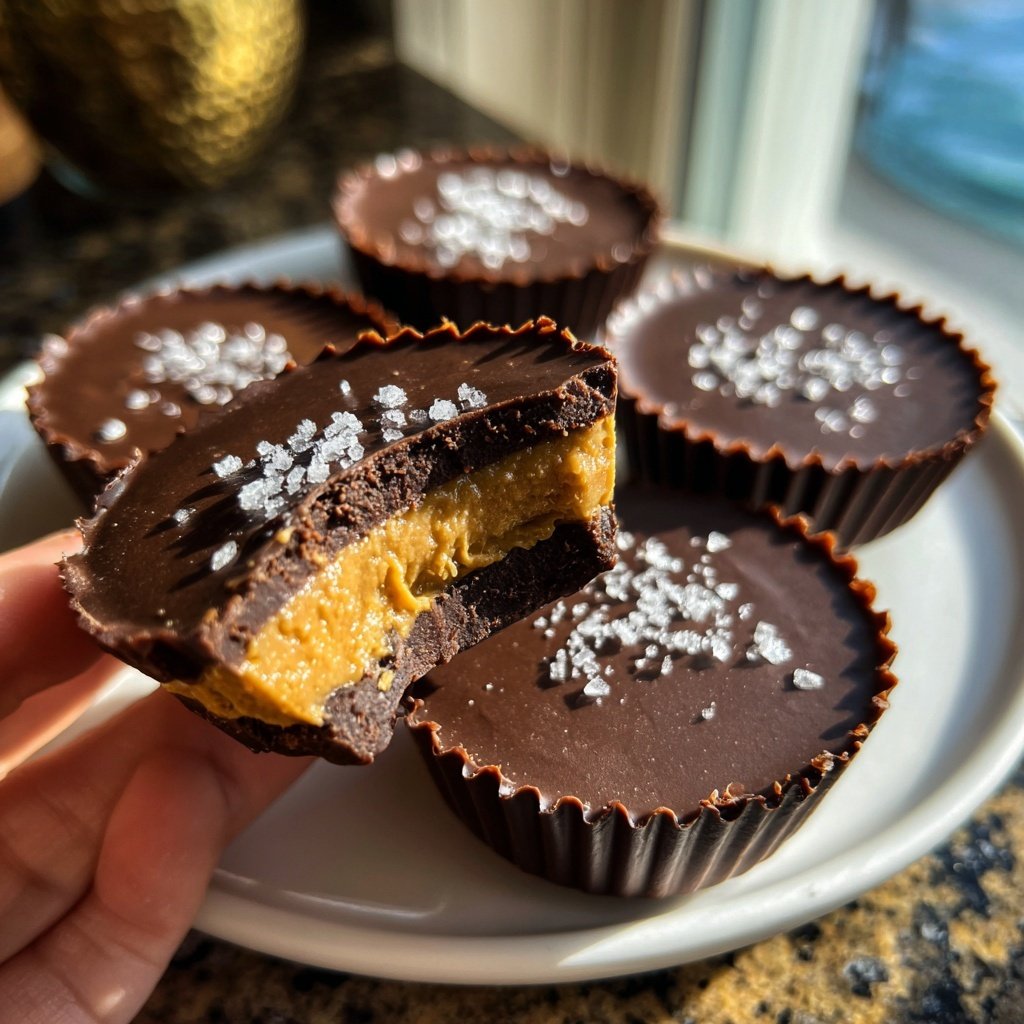
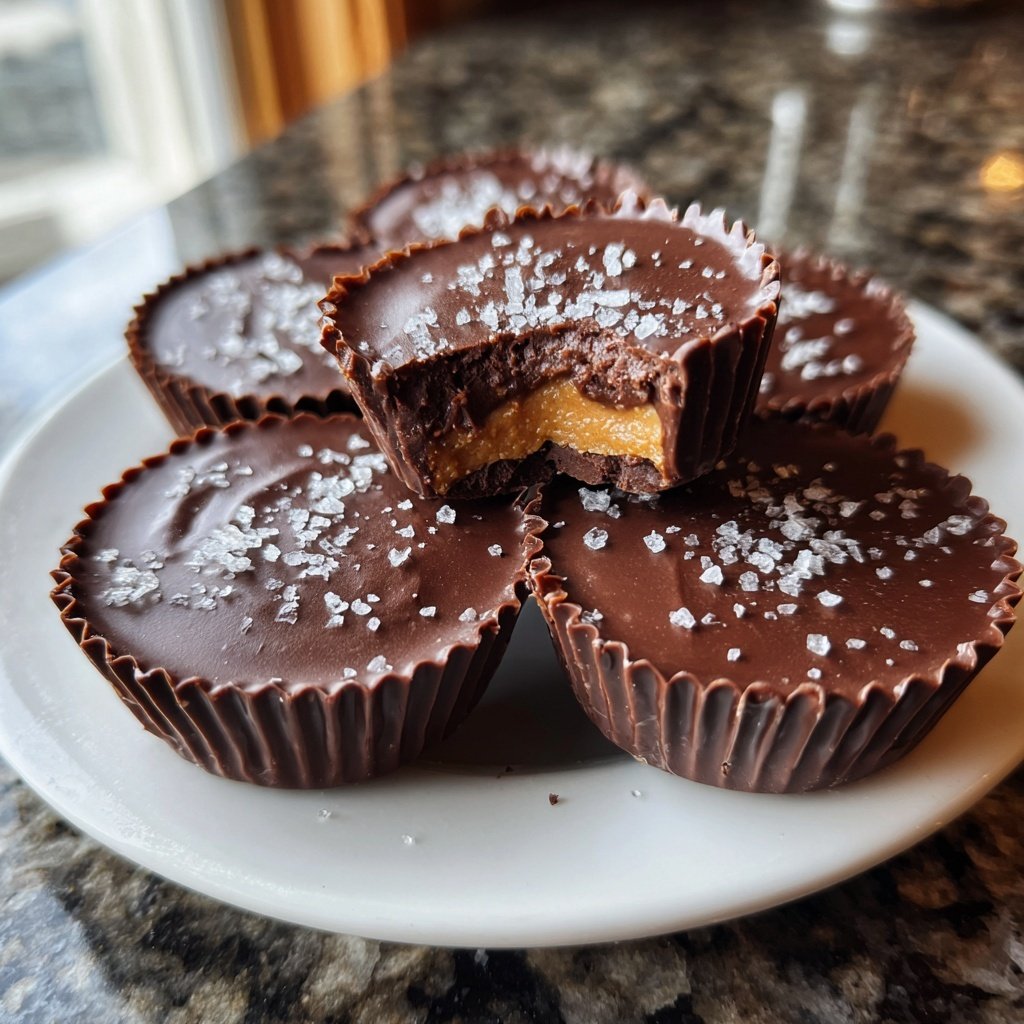
Homemade Reese’s Cups with Sea Salt
Highlighted under: Oven Ideas
I love making my own sweet treats at home, and these Homemade Reese’s Cups with Sea Salt have become a favorite. With just a few simple ingredients, I can whip up a decadent dessert that rivals any store-bought version. The best part is that I can control the sweetness and add that perfect touch of sea salt to enhance the rich chocolate and creamy peanut butter flavors. Trust me, once you try this recipe, you won't want to go back to the classics!
When I first tried my hand at making homemade Reese’s Cups, I was surprised by how simple and rewarding the process was. I started by melting chocolate and creating my own peanut butter filling. The moment I took my first bite, I knew I had struck gold. The combination of flavors and textures created a satisfying treat that is easily customizable!
One tip I learned along the way is to wait for the chocolate to slightly harden before adding the peanut butter mixture. This helps create a perfect layer and keeps the cups looking neat and delicious. Plus, a sprinkle of sea salt on top takes these cups to a whole new level of indulgence!
Why You Will Love This Recipe
- Rich chocolate flavor paired with creamy peanut butter
- Sea salt adds a delightful contrast to the sweetness
- Simple ingredients you likely already have at home
The Importance of Chocolate Quality
When making these Homemade Reese’s Cups, the quality of the chocolate is crucial. I recommend using high-quality dark and milk chocolate chips for the best flavor. Look for chocolate with around 60-70% cacao in the dark chocolate to achieve that perfect balance of richness without overwhelming bitterness. Chocolate with fewer additives will melt smoother for a glossy finish, which is ideal for achieving a professional look and texture in your cups.
Melting chocolate can be tricky; overheating can cause it to seize. To prevent this, always melt your chocolate in 30-second intervals, stirring well between each interval until it's just smooth and glossy. If you notice your chocolate has thickened or begun to seize, you can add a small amount of vegetable oil—about a teaspoon—to help restore its fluidity without compromising flavor.
Perfecting Your Peanut Butter Filling
For the filling, the choice of peanut butter greatly affects the texture and sweetness of your Reese’s Cups. Creamy peanut butter is essential here; it should be smooth and free from any large chunks to facilitate easy spreading. Natural peanut butters can be used as well, but be aware that they may have a runnier consistency, which could make filling your cups more challenging. If you prefer a lower sugar content, consider reducing the powdered sugar incrementally while tasting to find your ideal balance.
Mix the peanut butter, powdered sugar, and vanilla extract until the mixture is well-combined and smooth. I like to use a handheld mixer for this step, but a fork can also do the trick if you're looking for a workout! Make sure the filling is thick enough to hold its shape after you place it in the chocolate cups but still spreadable. If your mix feels too dry, a drop of milk can help achieve the right consistency.
Ingredients
Gather the following ingredients to make these mouthwatering cups.
For the Chocolate Cups
- 1 cup dark chocolate chips
- 1/2 cup milk chocolate chips
- 1/4 teaspoon sea salt
For the Peanut Butter Filling
- 1/2 cup creamy peanut butter
- 1/4 cup powdered sugar
- 1 teaspoon vanilla extract
Make sure to use good quality chocolate for the best results!
Instructions
Follow these easy steps to create your homemade Reese’s Cups.
Melt the Chocolate
In a microwave-safe bowl, combine the dark and milk chocolate chips. Melt in the microwave in 30-second intervals, stirring in between until smooth.
Prepare the Cup Molds
Using cupcake liners, place them in a muffin tin. Pour a small amount of melted chocolate into each liner, and use a brush or the back of a spoon to coat the sides.
Make the Peanut Butter Filling
In a bowl, mix together the creamy peanut butter, powdered sugar, and vanilla extract until well combined.
Fill the Chocolate Cups
Once the chocolate has slightly hardened, dollop a spoonful of peanut butter mixture into each chocolate cup. Smooth it out evenly.
Seal with More Chocolate
Pour the remaining melted chocolate over the peanut butter layer, ensuring to cover it completely. Add a sprinkle of sea salt on top.
Chill and Serve
Refrigerate for at least 20 minutes or until set. Enjoy your delicious homemade Reese’s Cups!
Feel free to experiment with different types of chocolate or add nuts for a twist!
Pro Tips
- For a richer flavor, try using dark chocolate for both layers. Also, chilling the cups longer will make them firmer and easier to handle.
Storage Tips
These Homemade Reese’s Cups can be stored in an airtight container in the refrigerator for up to two weeks. This also helps the flavors meld together beautifully over time, enhancing the taste. If you prefer them chilled, you can enjoy them straight from the fridge, but be mindful that the chocolate may become a bit harder than if stored at room temperature.
For longer storage, you can freeze the cups. Place them in a single layer in a freezer-safe container, separating layers with parchment paper to prevent sticking. They can last in the freezer for up to three months. To enjoy, simply take them out and let them sit at room temperature for a few minutes before indulging for phenomenal texture.
Perfect Pairings
These Homemade Reese’s Cups are delicious on their own, but they can also be paired nicely with a variety of treats. For example, serve them alongside a scoop of vanilla ice cream for a delectable contrast of textures. The warmth of the ice cream will soften the chocolate cups, making each bite an indulgent experience.
For a more festive presentation, try drizzling melted chocolate over the top of your cups before sprinkling with sea salt. This adds an extra layer of sweetness and creates a beautiful contrast against the chocolate and peanut butter, making them visually appealing for parties or gatherings.
Questions About Recipes
→ Can I use other nut butters?
Absolutely! Almond butter or cashew butter would work nicely as substitutes.
→ How do I store these cups?
Keep them in an airtight container in the refrigerator for up to a week.
→ Can I freeze them?
Yes, they freeze well! Just ensure they're in a sealed container, and they can last up to a month.
→ What if I don't have cupcake liners?
You can use small silicone molds or simply grease the muffin tin directly.
Homemade Reese’s Cups with Sea Salt
What You'll Need
For the Chocolate Cups
- 1 cup dark chocolate chips
- 1/2 cup milk chocolate chips
- 1/4 teaspoon sea salt
For the Peanut Butter Filling
- 1/2 cup creamy peanut butter
- 1/4 cup powdered sugar
- 1 teaspoon vanilla extract
How-To Steps
In a microwave-safe bowl, combine the dark and milk chocolate chips. Melt in the microwave in 30-second intervals, stirring in between until smooth.
Using cupcake liners, place them in a muffin tin. Pour a small amount of melted chocolate into each liner, and use a brush or the back of a spoon to coat the sides.
In a bowl, mix together the creamy peanut butter, powdered sugar, and vanilla extract until well combined.
Once the chocolate has slightly hardened, dollop a spoonful of peanut butter mixture into each chocolate cup. Smooth it out evenly.
Pour the remaining melted chocolate over the peanut butter layer, ensuring to cover it completely. Add a sprinkle of sea salt on top.
Refrigerate for at least 20 minutes or until set. Enjoy your delicious homemade Reese’s Cups!
Extra Tips
- For a richer flavor, try using dark chocolate for both layers. Also, chilling the cups longer will make them firmer and easier to handle.
Nutritional Breakdown (Per Serving)
- Calories: 150 kcal
- Total Fat: 10g
- Saturated Fat: 3g
- Cholesterol: 1mg
- Sodium: 70mg
- Total Carbohydrates: 14g
- Dietary Fiber: 1g
- Sugars: 9g
- Protein: 3g